All posts by Tim

Cave of Trouble

Cave of Trouble (CoT) is/was several things. The name that we made music under for one. It was also the band that worked for Chook Industries. It slowly morphed into only being a label for the music we made. Somewhere during the Chook era, we made a website for the band, and even touted the latest music we were working on, the Cigarette EP. That was a project we actually finished but never updated the site with. That also has never seen the light of day on the posts I was doing on CoT albums. Maybe someday.

This site had a cool feature I was rather proud of, one that is now defunct. The web server checked the weather in Salisbury, MD and displayed a drawing of the appropriate weather behind the monster graphic. Currently, I just have a random weather image being displayed. Also, at the bottom of the page, the weather was displayed in a line that said, “The weather at Bayland is _______ at 7:03 pm.” Bayland refers to [Bayland Aviation], located at the Salisbury airport

So, here is the original version of the Cave of Trouble website.

Cave of Trouble

Black Beans

So here’s a recipe I make a lot. It originated from something I found online. I then gave it to Mike and forgot about it. He made some modifications to it and sent it back to me. I made some more modifications, and this is the end result.

**Note**: Mike currently has a version of this which is sometimes referred to as *Mike’s 14 Hour Beans*. Who knows exactly what the details of it are or how good it is. We do know that the last 10 minutes of the cooking are extremely time sensitive…

***

Black Bean Soup

Prep 15
min
• Cook 8 hour • Makes
8
Source
Tim Gray

Ingredients

  • 1 lb of dried black beans
  • 3 pieces of bacon
  • 1 jalapeño pepper
  • 2 serrano peppers
  • 1/2 onion
  • 4 cloves of garlic
  • 1 tsp rosemary
  • 1 tsp thyme
  • 4 cups of vegetable broth
  • 2 cups of water
  • 2 juice limes

Directions

1. Sort and wash
beans.

2. Finely chop onion, peppers,
and garlic.

3. Fry bacon and
chop.

4. Fry onions in bacon
fat.

5. Add all ingredients to crock
pot and cook on low for 8 hours. Alternately, simmer on the
stove top in a covered dutch oven for about 6
hours.

6. Near the end, mush the beans
against the side to thicken.

Notes

Adjust the amount of water added for thicker or more
watery beans (1-3 cups of water).

Adjust peppers for desired hotness. You can also add
cayenne pepper powder.

the mindlab

The original mindlab site was an offshoot of the Chook Industries website, version 2. The mindlab was supposed to be Larry Snow’s personal website. Larry was the president of Chook Industries. Most of the activity on the site was from mid 2000 to mid 2003. Mike authored almost all of the posts if I recall correctly.

larrytit

Note, this was back in the day of expensive domain names and limited shared hosting accounts. The original mindlab was pretty cutting edge, as was the whole Chook Industries site. It was a PHP driven site which read content from a collection of plain text files, one for each post, and generated an RSS file. Yes, RSS back in 2000. We had it listed on the Netscape RSS directory, pretty much the only place on the internet that used RSS. I also used the RSS file to automatically generate content for the Chook Industries main page.

Circa 2010, we moved servers and I did a quick redesign of the site, where I detached it from Chook Industries and split it off into its own website. At that point, Mike did a few sporadic posts and then stopped.

So, with that being said, here are both the original and 2010 versions of the mindlab:

Cast iron pans

About 12 years ago I decided to purchase some cooking wares. I had just started graduate school and was cooking on my own for reals for the first time. All my friends were buying the $20 47-piece kitchen utensil set and a bunch of crappy pots and pans. I decided to do something different.

I ended up buying some stuff ‘for life.’ I think I spent $40 on the knife; I don’t remember about the pots. That’s neither here nor there. The point is that I still have the these items and I still use them a lot. I can see easily getting another 10-15 years out of them. Most of my friends’ 47-piece utensil sets started to self-destruct in about 9 months, necessitating the purchase of a new 47-piece utensil set about every 2 years or so.

The pan – cast iron

For a frying pan/skillet, nothing beats a good cast iron skillet by Lodge. They are cheap and American made. My mom gave me a vintage one, which most aficionados swear by because “they don’t make them like they used to,” but frankly, I like the new one more. I actually have two, and 8″ one and a 12″ one. I use the 8″ one more since I’m cooking small things, but for some things the 12″ is needed. You could easily make do with just a 12″ one, or possibly a 10″ one.

Contrary to what you might read, cast iron is a poor conductor of heat compared to copper or aluminum. So you want to match the size of the pan with the size of your burner. It does retain heat well though. I’m finding that the 8″ pan is great on all my stove’s burners, while the 12″ is pushing it a bit on the large burner; it develops a hot spot in the center. It’s usable though and is great in the oven. I suspect a 10″ one would be just about perfect.

You don’t want to cook acidic things in cast iron. So heating up some tomato sauce is probably not a good idea.

I hear carbon steel skillets are similar to cast iron and could also be a good buy, particularly if you want a different form factor. I’ve not tried one.

Seasoning and cleaning cast iron cookware

The key to cast iron is the seasoning and care. When you get the thing, give it a good scrub with hot water. Dry it off and stick it on the stove for a bit on medium heat. Get it nice and dry. Then turn on the oven to 450°. Rub a coat of oil all over the pan. I’ve been using safflower oil and it works real good. After you’ve rubbed oil all over it, get a clean paper towel and wipe most of it off. Stick it in the heating oven, let it cook at 450° for 30-60 minutes, then turn off the oven and let the it all cool down together. This process can make your place smell a little bit, so I have to do it when I’m home alone. Do this 2-4 times. Now your pan is seasoned properly. I’d do this with new pans even though they come ‘pre-seasoned.’

You probably want to avoid olive oil for this step and the reapplication steps later on because it’s a low heat oil and can really smoke a lot. Canola oil is probably fine if you don’t want to go out and buy safflower.

For regular cleaning after use, scrub it with only hot water. Don’t use a sponge that gets used with soap. I have a separate scrubby pad for my cast iron pans, a Dobie pad. Or don’t even scrub it under water if it doesn’t look like it needs it. Just wipe it out with a paper towel, using a little bit of salt in the pan if you need to scrub out some junk.1

Now that you’ve scrubbed the food bits off, dry it off and throw it back on the stove. Heat it up for a couple minutes on medium to dry it out nice and good. Then rub a thin coat of your oil (safflower again) on the cooking surface, wiping off the excess. Then turn off the burner.

The more you use the pan, the better it will work. Just keep it dry, and re-oil/re-season it when you think it needs it.

Scrapple

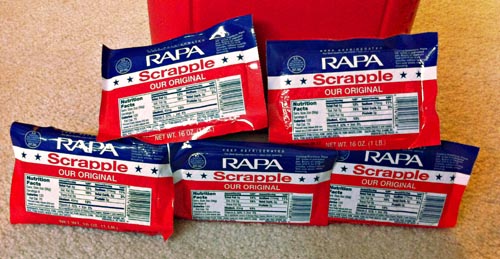
My pan cooks scrapple easier than anything I’ve ever cooked scrapple on. Cooking foods like scrapple are great because they help season the surface more. So go out and buy some Rapa early on because you “have to season” your new pan.

Bacon can be good as it has a lot of fat, but it can also have a fair amount of sugar in it, which can make goopy stuff in your pan.


  1. If you do this while the pan is still hot, you can probably skip the reheating and oiling. 

Document scanners

I’ve been hauling around boxes and boxes of notes from my past. Things from graduate school, things from college. Things I had poured years of my life into. As a result, I have a hard time throwing some of this stuff away, even though there’s a 99.9% chance I will never use it again.

Recently, I searched around for some kind of service to scan it all in for me for a price, but it appears that most of those places cater to businesses. Scanning all my crap on a flatbed scanner was depressing since it would be way too slow of a process. I even thought about renting storage space to store this crap in just to free up closet space.

Things changed during my brief tenure at a nuclear power plant, where I was introduced to a $5000 document scanner than could scan 90 double sided pages a minute (180 pages). It was crazy. It was also $5000. Sure it slowed down when you scanned at a resolution I would use (600 dpi) for archiving important stuff, but you could still chew through a binder of papers in 5 minutes or so. A little bit of research turned up their consumer version for $400, the Fujitsu ScanSnap ix500. I figured that would be small price to pay to allow me to part with some of my crap with no guilt, so I bought one. It scans about 30 pages per minute at 600 dpi, which is 60 pages if you are scanning in duplex.

This thing is amazing. So far in the two weeks I’ve had it, I’ve scanned over 5000 pages1, enough to fill a 12″ x 12″ x 24″ box. Most of this stuff was handwritten notes, written lightly in pencil on an assortment of paper types (legal paper, notebook paper, engineering graph paper, and printer paper). The auto adjustments for darkness are pretty much perfect and so far everything has come out great. Better than what I got from the aforementioned $5000 scanner. The software will also automatically remove blank pages, i.e., the back sides of paper if you are scanning in duplex. The OCR is pretty quick too, so you can get searchable PDFs. If you are on Windows (I’m not) you also get a full version of Adobe Acrobat X, which is a pretty nice program.

In addition to my old physics notes, I’ve been archiving old investment and bank statements, allowing me to shred that stuff and get rid of it. Once the years of backlog material is worked through, when a new bill or statement comes through, it will take about 20 seconds to scan it and file it.

This short review probably sounds like I’m getting paid to write it. I know I don’t normally write shit like this, but this is seriously a really useful purchase that will change the way I deal files. If you don’t have as big of a backlog as I do, I think Fujitsu sells slower but cheaper scanners. I figured I’d spend the extra money since after I finish my files, I’m going to work several other people’s files, and the extra speed will pay off.


  1. Mostly scanned during the first week of ownership. 

eD&D

We used to play D&D when we were younger. Then we went away to college. We still played every once in a while, over the summer, or over the random holiday, but not that much. Years later, Protocon occurred. Despite Mike’s mislabeling of the 2011 event, we actually had 4 of them. Most Protocons featured some form of role playing game; one year it was Star Frontiers and for Protocon 4, we played about 3 pages of Expedition to the Barrier Peaks.

Sometime near the end of 2011, I started playing D&D again with some people I knew in college. It was fun. Then I moved. I realized that finally technology had gotten to the point where we could conceivably run some games virtually. We could all get on Google Hangouts and video chat at the same time. As a bonus, you can share documents and pictures in your session, so I could throw up a map or something and people could draw little icons representing where they were, etc. I talked it over with people and everyone seemed interested.

After moving, life was a bit hectic for all of us. Tom got married and Mike and Joe had just moved too. Things finally settled down after the new year and we scheduled our first session to test out video chatting and to roll up some characters.

Things were a little rough, but promising. I discussed (virtually) with everyone different options I was thinking about for maps:

  • No maps like we used to play in 2nd edition – all in your head.
  • Using a Google sketch document to place a background image and move around
    icons.
  • Use a program like Maptool.
  • Use a cross between the two above options, like Tabletop Forge.

Everyone seemed to want to avoid the first option for now and try out 3rd edition’s more tactical battle, which requires a map and miniatures. So we tried using a sketch document as a makeshift map. My take on that: It can work, but it’s a pain in the butt. It’d probably work better in a 2nd edition environment to indicate positioning, but with anything that requires more precise locations, like attacks of opportunity, etc., it becomes a bit of a headache. The number one problem is there is no way to lock the background image, so if anyone, player or GM, misses an icon and accidentally targets the map, the map gets dragged. Which is a drag.

We also checked out Tabletop Forge. It worked in the Google Hangouts environment, and provided some extra functionality over a sketch document and wasn’t as involved as a full-blown solution like Maptool. Unfortunately, it was still too early in the development phase to work (in my mind).1

Lastly, we tried Maptool. I had some issues getting the right ports open on my router in the first go, but Brian and Mike really liked the idea of the more sophisticated map. I didn’t exactly relish all the extra preparation that would go into running a game with Maptool, but it was duly noted how much they seemed to like the idea, so I told them I’d investigate it a bit more.

The next day or so, I stumbled upon Roll20. Wow! This was it. A nice clean easy to use interface, the ability to use it within Google Hangouts if you wanted (we don’t yet), and some nifty extra features like visual line of sights, fog of war, and keeping track of some simple stats like hit points. I started loading in maps right away.

That was about a month ago. We’ve actually had 2 or 3 playing sessions, and besides the one where Mike’s computer kept overheating and shutting down, it works surprisingly well. One game has been completed, A Dark and Stormy Knight, which was free from Wizards of the Coast. This past weekend, we just started on The Keep on the Borderlands, by request of Mike. It’s a pretty shitty adventure in many ways since there’s so little in the way of a plot actually in the module. Unfortunately, not only due to my lack of motivation to really make it good, my skills are a wee bit rusty. Hopefully it will turn out okay though. In a future post, after we finish it, I’ll put up some of the extra maps I drew for the game and do a post-mortem.


  1. Shortly after I paid a small amount of money to have access to the newer betas of Tabletop Forge, the developer decided to merge efforts with Roll20. As a result, I get access, for life I think, to the Roll20 subscription features like dynamic lighting and ad-free play. I can say this about these features: If you play at least once a week, it’s totally worth the $5/month subscription. Especially if you can get your players to pitch in.